Diving into the world of paper crafts can be incredibly rewarding, even if you’re just starting out. It’s a creative outlet that lets you transform simple sheets of paper into stunning art pieces, decorations, or thoughtful gifts.

Beginners often find joy in mastering basic folds and cuts, building confidence with each successful project. Plus, paper crafting is budget-friendly and perfect for anyone looking to unwind and express themselves artistically.
Whether you want to create delicate origami or intricate paper sculptures, the possibilities are endless. Let’s explore the essential tips and techniques to get you started on this fun journey!
Read on, and I’ll walk you through everything you need to know.
Choosing the Right Paper for Your Projects
Understanding Different Paper Types
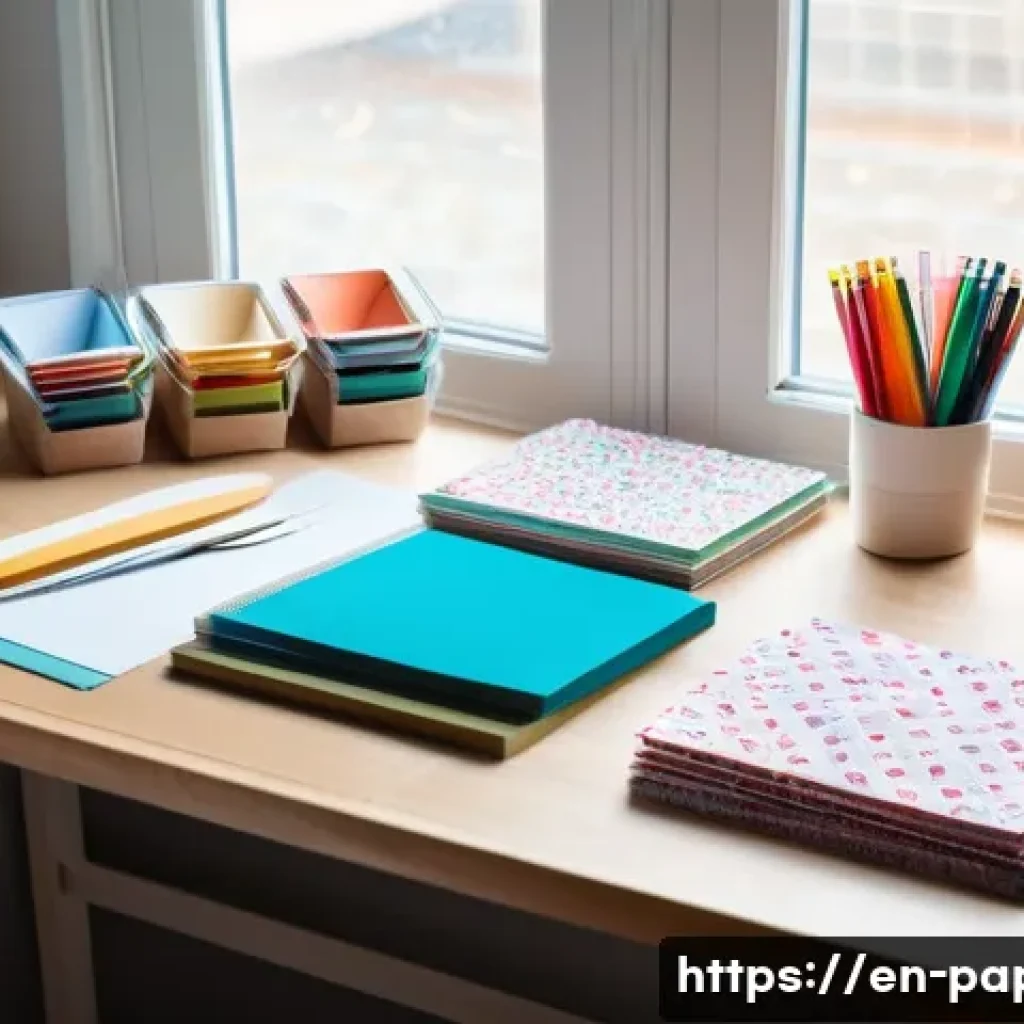
When you first dive into paper crafting, it’s easy to get overwhelmed by the sheer variety of papers available. From cardstock to origami paper and even specialty textured sheets, each type serves a different purpose.
For beginners, cardstock is usually a great starting point because it’s sturdy and holds folds well without tearing. Origami paper, on the other hand, is thinner and more flexible, ideal for intricate folds but requires a gentler touch.
Knowing these differences helps you pick the right paper for your project, making the process smoother and more enjoyable.
Weight and Thickness Matter
One thing I learned early on is that paper weight can make or break your craft. Heavier papers (measured in gsm, or grams per square meter) provide durability but can be tougher to fold, especially if your design involves multiple layers.
Lightweight papers are easier to manipulate but may not hold shapes as well or might tear easily. For example, a 120-160 gsm paper is perfect for most beginner projects, offering a balance between flexibility and sturdiness.
Playing around with different weights will help you understand what works best for your style.
Color and Pattern Selection Tips
Choosing colors and patterns isn’t just about aesthetics; it can affect how your final piece looks and feels. Solid colors are great for beginners because they emphasize folds and shapes without distractions.
Patterned or textured papers can add depth and interest but may hide subtle details. When picking colors, consider the theme of your project—pastels for delicate, soft designs or vibrant hues for bold statements.
Also, experimenting with double-sided papers adds a fun twist, revealing contrasting colors on each side when folded.
Essential Tools That Make Crafting Easier
Basic Tools Every Beginner Should Have
Starting with the right tools can elevate your paper crafting experience. A sharp pair of scissors, a precision craft knife, and a sturdy cutting mat are essentials.
I can’t emphasize enough how much easier cutting straight lines and detailed shapes becomes with a good-quality craft knife compared to scissors alone.
Additionally, a metal ruler helps guide your cuts and folds for accuracy. These basic tools are affordable and will last you a long time, making them a smart investment.
Tools for Precise Folding and Scoring
Scoring tools are a game changer, especially for projects that require crisp, clean folds. Using a bone folder or a scoring stylus allows you to create precise fold lines without damaging the paper.
I remember the first time I used a bone folder; my paper crafts looked so much more professional and neat. Scoring is particularly useful when working with thicker papers or multiple layers, preventing cracking and uneven folds.
Adhesives and Their Best Uses
Adhesives are crucial for assembling multi-piece crafts. While glue sticks are convenient and mess-free, they may not hold heavier papers firmly. Liquid glue offers stronger adhesion but requires a steady hand to avoid smudges.
Double-sided tape is fantastic for instant bonding and clean edges, making it perfect for decorations or cards. Experimenting with different adhesives helps you understand which one suits your project’s needs, especially when balancing strength and neatness.
Mastering Basic Folding Techniques
The Foundation: Valley and Mountain Folds
Every paper crafter starts with the basics—valley and mountain folds. A valley fold creates a crease that dips inward, like a “V,” while a mountain fold peaks outward, resembling an inverted “V.” Mastering these two folds is essential because they form the foundation for more complex designs.
I often practice these folds repeatedly to get a feel for the pressure needed without tearing the paper. Simple as they seem, perfecting these folds sets you up for success in more advanced projects.
Creating Sharp Creases
Sharp creases make your paper crafts stand out by adding structure and definition. Using your fingernail or a bone folder to press down on folds ensures they stay crisp.
I’ve found that running the bone folder along the fold several times after folding really helps the paper hold its shape. If the crease isn’t sharp enough, the model may look sloppy or not hold together well, so this step is worth the extra effort.
Combining Folds for Complex Shapes
Once you’re comfortable with basic folds, you’ll notice many designs combine valley and mountain folds in interesting ways. For example, origami cranes or modular boxes rely on folding sequences that alternate between these two.
Practicing folding patterns like pleats or squash folds will build your skills and confidence. The key is patience; complex shapes look intimidating but become manageable when broken down into simple fold steps.
Cutting and Shaping Techniques for Detail
Using Templates and Stencils
Cutting shapes accurately can be tricky, especially when starting out. Using templates or stencils provides a reliable guide, ensuring your pieces fit together perfectly.
You can find printable templates online or create your own by tracing shapes onto cardboard or plastic sheets. I often trace my designs before cutting to avoid mistakes and save paper.
This extra step might seem tedious but pays off with cleaner, more precise results.
Freehand Cutting Tips
While templates are helpful, freehand cutting is a valuable skill that adds flexibility to your projects. I recommend practicing with simple shapes like circles or stars, focusing on steady hand movements and slow cutting.
Holding scissors or knives properly and rotating the paper rather than the tool helps maintain control. With time, freehand cutting allows you to customize your designs spontaneously, which is really rewarding.
Adding Texture and Dimension

Cutting isn’t just about shapes—adding texture can bring your paper art to life. Techniques like fringes, scalloped edges, or layering different paper pieces create visual interest.
I like to experiment with layering thin strips of paper or creating 3D petals for flowers. These small details make a big difference and give your crafts a professional touch without requiring advanced skills.
Organizing Your Workspace for Efficiency
Setting Up a Dedicated Craft Area
Having a clean, organized space dedicated to your paper crafts can boost creativity and reduce frustration. I found that clutter-free desks with good lighting make a huge difference in how focused and productive I feel.
Keep your tools within reach, but neatly arranged so you don’t waste time searching for scissors or glue. A small storage box or drawer for paper and supplies keeps everything tidy and easy to access.
Maintaining Supplies and Materials
Regularly checking your inventory helps avoid mid-project interruptions. I keep a checklist of essential items like extra blades, glue sticks, and different paper types.
Replenishing supplies before they run out means less stress and more uninterrupted crafting time. Also, keeping scraps organized by size or color can inspire future projects, reducing waste and sparking creativity.
Cleaning Tips to Preserve Tools and Space
Taking care of your tools extends their life and keeps your workspace inviting. After each session, wiping down your cutting mat and cleaning blades of glue residue prevents buildup.
I also sharpen my craft knives regularly and replace dull blades promptly to maintain precision. A tidy environment not only looks better but also helps your mind stay clear and focused on crafting.
Incorporating Color and Design Principles
Understanding Color Theory Basics
Even if you’re new to paper crafts, a little knowledge of color theory can dramatically improve your projects. Complementary colors (like blue and orange) create striking contrasts, while analogous colors (like blue, green, and teal) offer harmonious blends.
I often pick color palettes based on the mood I want to evoke—warm colors for energy and cool tones for calmness. Playing with color combinations can turn a simple paper piece into a stunning visual story.
Balancing Patterns and Solids
Mixing patterned paper with solid colors adds depth without overwhelming the design. For example, pairing a floral print with a matching solid color background helps the pattern pop while maintaining balance.
When working on layered projects, I like to use patterns sparingly as accents so they don’t compete with the overall form. It’s a subtle way to guide the viewer’s eye and highlight key features.
Adding Embellishments Thoughtfully
Embellishments like glitter, stickers, or small beads can elevate your paper crafts, but less is often more. I’ve learned that a few well-placed accents create impact, while too many can clutter the design.
Consider the style and purpose of your project—delicate touches for elegant cards or bold decorations for festive crafts. Experimenting with textures and finishes adds personality and uniqueness to your work.
Common Mistakes and How to Avoid Them
Rushing Through Steps
One of the biggest pitfalls for beginners is trying to finish projects too quickly. I used to rush and ended up with crooked folds or torn paper, which was frustrating.
Taking your time, especially with measuring, folding, and cutting, makes a huge difference in the final outcome. Patience is key; the more deliberate you are, the more polished your crafts will look.
Ignoring Tool Maintenance
Neglecting to keep your tools sharp and clean can lead to poor results. Dull scissors or knives cause jagged cuts, and dirty glue applicators can ruin your paper’s surface.
Regular maintenance might seem like extra work, but it saves time and frustration in the long run. I schedule quick cleanups after every crafting session, and it keeps my supplies in top shape.
Not Testing New Techniques First
Trying a new fold or cut directly on your final paper can be risky. I always practice on scrap paper first to avoid wasting materials. This trial run helps me understand the technique’s difficulty and adjust my approach.
Testing also boosts confidence, which is crucial when tackling more complicated designs. Don’t hesitate to experiment before committing to your main project.
| Common Mistake | Impact | How to Avoid |
|---|---|---|
| Rushing through steps | Uneven folds, torn paper, sloppy finish | Work slowly and deliberately, focus on accuracy |
| Ignoring tool maintenance | Jagged cuts, glue smudges, damaged materials | Regularly clean and sharpen tools after use |
| Not testing techniques | Wasted materials, project failure | Practice on scrap paper before main project |
| Using wrong paper type | Difficulty folding, tearing, poor structure | Choose paper weight and type suited for project |
| Overusing embellishments | Cluttered design, distracted focus | Use accents sparingly and purposefully |
Wrapping Up
Choosing the right materials and tools truly transforms your paper crafting experience. With patience and practice, even the most intricate designs become manageable and enjoyable. Remember, every expert was once a beginner, so embrace the learning process and have fun creating. Your projects will improve steadily as you develop your skills and explore new techniques.
Useful Tips to Keep in Mind
1. Always select paper that matches your project’s complexity and durability needs to avoid frustration during crafting.
2. Invest in quality tools like a sharp craft knife and bone folder to make your work cleaner and more professional.
3. Take your time with folding and cutting; rushing often leads to mistakes that are hard to fix.
4. Maintain your workspace and tools regularly to ensure smooth and enjoyable crafting sessions.
5. Experiment with colors and textures thoughtfully to add personality without overwhelming your design.
Key Takeaways
Understanding the right paper type and weight is fundamental for successful crafting. Proper tools and techniques, especially folding and cutting, significantly impact the final result. Patience and regular practice help avoid common mistakes such as tearing or uneven folds. Maintaining your tools and workspace keeps your creative flow uninterrupted. Lastly, thoughtful design choices and minimal embellishments enhance the beauty and professionalism of your projects.
Frequently Asked Questions (FAQ) 📖
Q: What basic tools do I need to start paper crafting as a beginner?
A: When I first started paper crafting, I realized that you don’t need a lot of fancy tools to create beautiful projects. The essentials are a good pair of scissors, a craft knife for precise cuts, a ruler, and a cutting mat to protect your surfaces.
Having a bone folder or a similar tool for making crisp folds can really elevate your work. Also, a variety of paper types—like cardstock, origami paper, or patterned scrapbook paper—will give you more creative freedom.
Starting with these basics keeps things simple but effective, letting you focus on mastering your techniques without feeling overwhelmed.
Q: How can I avoid frustration when learning complicated paper folding techniques?
A: I totally get how tricky some folds can be! What helped me the most was breaking down the process into smaller, manageable steps and practicing each fold slowly before moving on.
Watching tutorial videos or following step-by-step illustrated guides also made a huge difference. Don’t rush—patience is key here. It’s perfectly normal to mess up a few times; each mistake is actually a learning opportunity.
Plus, I found that working on easier projects first helped build my confidence, so I didn’t feel discouraged when tackling more complex designs later on.
Q: Are there any tips to make my paper crafts look more professional?
A: Absolutely! One thing I learned is that attention to detail really sets your work apart. Make sure your cuts are clean and your folds are sharp—using tools like a bone folder can help with that.
Choosing high-quality paper also makes a noticeable difference in the final look and feel. Another tip is to be mindful of color combinations and patterns, ensuring they complement each other rather than clash.
Lastly, take your time assembling your pieces; rushing can lead to misaligned parts or glue smudges. When I started focusing on these small details, my projects instantly looked more polished and impressive.