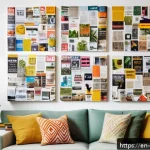
Paper art collage is a captivating way to transform ordinary sheets into extraordinary visual stories. By layering different textures, colors, and shapes, artists breathe life into their creations, making each piece uniquely expressive.

Whether you’re a beginner or a seasoned crafter, this technique offers endless possibilities for creativity and personal expression. It’s fascinating how simple paper can become a medium for such intricate and vibrant artworks.
If you’ve ever wanted to explore a hands-on art form that’s both relaxing and inspiring, paper collage might just be your next favorite hobby. Let’s dive in and discover all the exciting details together!
Exploring Essential Tools and Materials for Paper Collage
Choosing the Right Paper Types
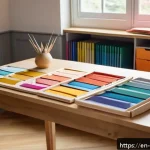
When starting a paper collage project, the type of paper you select can dramatically influence the final look and feel of your artwork. I’ve found that mixing textures—like smooth cardstock with rough handmade paper—adds a tactile richness that you can almost feel just by looking.
Colored tissue paper, glossy magazine pages, and even thin vellum each bring their own personality to the piece. Personally, I like to keep a variety of paper weights on hand; heavier papers create bold, sturdy layers, while lighter papers let underlying colors peek through, creating a sense of depth and intrigue.
Experimenting with different paper types often leads to surprising and delightful effects that keep the creative process exciting.
Essential Adhesives and Cutting Tools
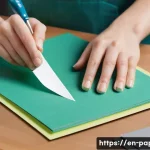
Getting the right glue is crucial because it affects how your layers hold together and how clean your edges look. I’ve tried everything from glue sticks to liquid adhesives, but my go-to is acid-free PVA glue.
It dries clear, doesn’t wrinkle the paper, and provides a strong bond. For cutting, a sharp craft knife paired with a self-healing cutting mat offers precision that scissors just can’t match, especially when working with detailed shapes.
However, for quick, larger cuts, good-quality scissors are indispensable. Using these tools carefully not only saves time but also ensures your collage pieces fit perfectly, enhancing the overall harmony of the artwork.
Supporting Materials and Workspace Setup
A well-organized workspace can make a huge difference in how smoothly your collage process flows. I always keep a small container for scraps, a ruler for straight edges, and tweezers for placing tiny pieces with accuracy.
Lighting is another key factor; natural light or a daylight-balanced lamp helps you see colors authentically, which is essential when layering multiple hues.
Additionally, having a flat surface to work on prevents paper warping and allows you to build your layers steadily. Over time, I realized that investing a little time in preparing my materials and workspace helps me stay in the creative zone longer without frustration.
Techniques to Elevate Your Paper Collage Artistry
Layering for Depth and Dimension
One of the most rewarding parts of making paper collages is mastering the art of layering. By strategically overlapping different shapes, textures, and colors, you create a visual hierarchy that guides the viewer’s eye through the piece.
When I started, I noticed my collages looked flat and lifeless, but once I began experimenting with shadows and raised sections, the artworks gained a lively, almost 3D quality.
You can use foam pads or double-sided tape to lift certain elements off the base layer, adding real physical depth. This technique transforms simple flat sheets into dynamic compositions that tell a story beyond the surface.
Incorporating Mixed Media Elements
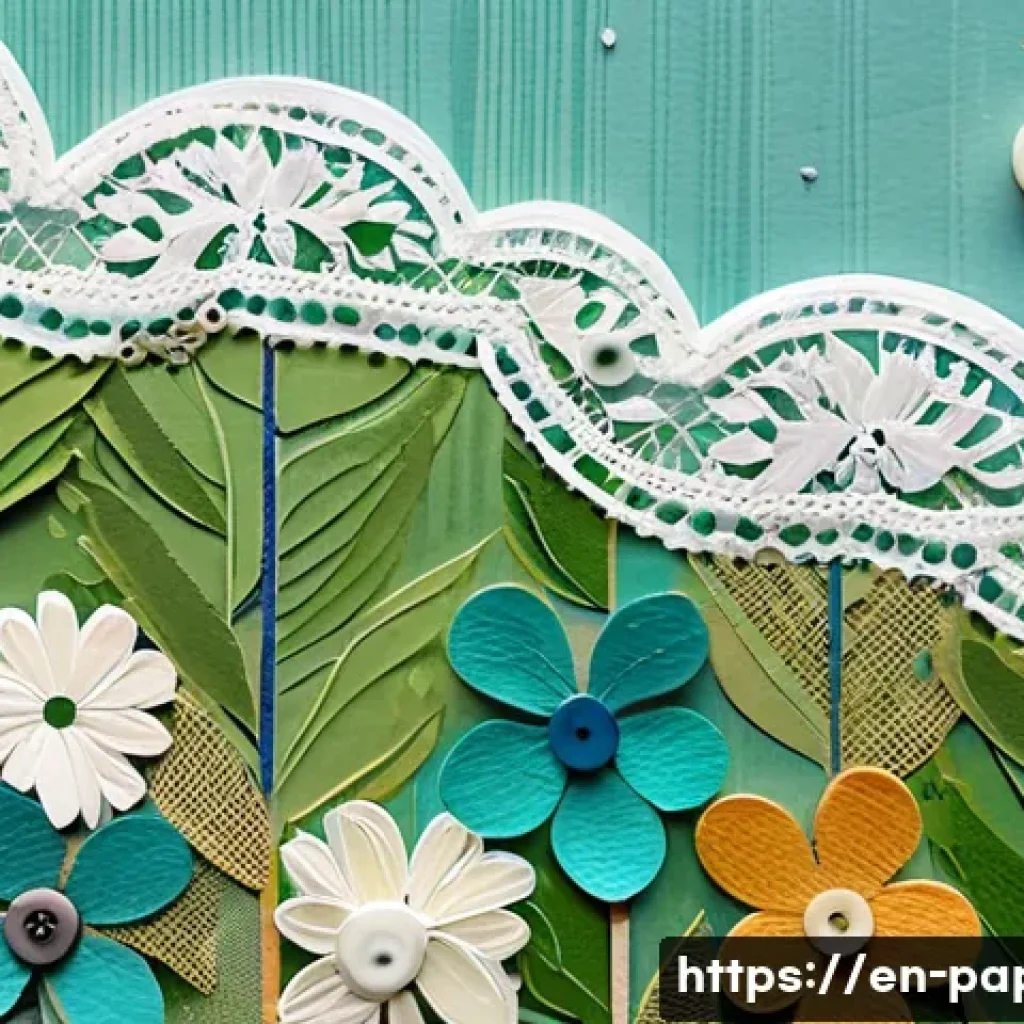
Adding materials beyond paper, like fabric scraps, thread, or even small found objects, can bring unexpected texture and interest to your collage. I remember trying this for the first time by gluing tiny buttons and pieces of lace onto my work, and it instantly made the piece feel more personal and tactile.
The key is to balance these elements so they complement rather than overwhelm the paper layers. Mixed media also invites you to explore new themes and narratives, making your collage a richer, more immersive experience both for you as the creator and for anyone who views it.
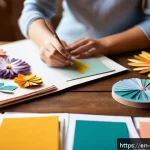
Using Color Theory to Guide Your Choices
Color selection might seem straightforward, but diving into color theory can elevate your collage from pretty to powerful. I’ve learned that choosing complementary or analogous colors can create harmony or tension, depending on the mood I want to evoke.
For example, pairing warm reds with cool blues can produce a vibrant contrast that energizes the piece, while sticking to a monochromatic palette can evoke calm and sophistication.
Playing with saturation and transparency adds another layer of complexity, allowing you to subtly shift the emotional tone. Understanding these principles helps you make intentional, confident choices rather than guessing.
Creative Inspiration and Project Ideas to Kickstart Your Collage Journey
Nature-Inspired Collages
Nature offers an endless source of inspiration for collage artists. I often collect leaves, flower petals, and textured bark patterns to replicate or incorporate into my collages.
By layering natural shapes with colored paper, you can create works that feel organic and alive. This approach not only connects you with the outdoors but also encourages mindfulness, as you notice the intricate details in plants and landscapes.
For beginners, starting with a simple leaf silhouette layered with various shades of green can be both satisfying and a great exercise in composition.
Abstract Expression Through Shapes and Colors
If realism isn’t your thing, abstract collage offers complete freedom to explore shapes, textures, and colors without constraints. I love how this method allows me to express emotions visually—sharp angles can convey tension, while soft curves suggest calm.
Start with a color scheme or mood you want to express, then cut and arrange paper pieces intuitively. Sometimes the most compelling collages happen when you let go of strict planning and trust your instincts.
This technique is also fantastic for stress relief because it encourages playful experimentation.
Personal Storytelling with Collage Portraits
Using collage to create portraits or visual stories is a deeply personal way to connect with your art. I once made a portrait collage of a family member by combining photos, handwritten notes, and meaningful paper scraps, which turned into a treasured keepsake.
This technique involves layering different elements that represent the person’s personality, memories, and interests, making each piece a unique narrative.
It’s not only a creative challenge but also a heartfelt project that can be shared or gifted, adding emotional depth to the art form.
Common Challenges and How to Overcome Them
Preventing Paper Curling and Warping
One of the frustrations I faced early on was paper curling after gluing, which can ruin the clean lines I’m aiming for. To combat this, I recommend using minimal adhesive and spreading it evenly.
Weighting down your collage with books while it dries helps keep everything flat. Also, choosing heavier paper for your base layer reduces warping significantly.
If you notice curling during the process, gently pressing the paper between smooth surfaces can help smooth it out without damaging the layers.
Maintaining Clean Edges and Precise Cuts
Achieving crisp edges is essential for a polished look, but it takes practice and the right tools. I found that dull scissors or knives tear the paper and create ragged edges, so regularly sharpening or replacing blades is key.
When working on detailed shapes, slow and deliberate cutting reduces mistakes. Using a metal ruler as a guide can help keep lines straight, especially on geometric designs.
Patience is crucial here; rushing often leads to frustration and sloppy results.
Balancing Complexity and Simplicity
It’s tempting to add as many layers and elements as possible, but sometimes less is more. I’ve learned that stepping back periodically to evaluate your work helps maintain balance.
If a collage feels too busy, simplifying some areas or introducing negative space can provide breathing room and focus. On the flip side, if it feels too sparse, layering additional textures or colors can add interest.
This balancing act is part of what makes collage so engaging—it constantly challenges your judgment and aesthetic sense.
Practical Tips for Displaying and Preserving Your Collage Art
Choosing the Right Frame and Mounting
Displaying your collage properly protects it and showcases its beauty. I’ve found that shadow box frames work wonderfully because they provide depth and prevent the paper from being crushed.
Mounting your collage on acid-free backing boards preserves the paper’s color and integrity over time. When framing, avoid glass that touches the artwork directly; instead, use spacers or mats to create a gap.
This prevents moisture buildup and sticking, which can damage delicate paper layers.
Protecting Against Light and Environmental Damage
Paper is vulnerable to fading and yellowing when exposed to sunlight and humidity. To keep your collage vibrant, place it in areas with indirect light and stable temperature.
Using UV-protective glass or acrylic in your frame further guards against color loss. I also recommend occasionally checking your artwork for signs of wear or discoloration so you can address issues early.
Proper care ensures your collage remains a beautiful focal point for years.
Creative Ways to Gift and Share Your Paper Collages
Collages make heartfelt, personalized gifts that recipients often treasure. I like to create small collages on sturdy cardstock, then turn them into greeting cards or bookmarks.
Another idea is to scan your artwork and print it on items like tote bags or calendars, giving your art a new life and audience. Sharing your work on social media or local craft fairs can also connect you with a supportive community of fellow art lovers and open doors to creative collaborations.
Comparing Popular Paper Collage Styles and Their Unique Features
| Collage Style | Typical Materials | Visual Characteristics | Ideal For |
|---|---|---|---|
| Traditional Cut-and-Paste | Magazines, newspapers, colored paper | Sharp edges, layered images, often thematic | Beginners and narrative storytelling |
| Mixed Media Collage | Paper, fabric, paint, found objects | Textured, dimensional, rich in materials | Artists seeking tactile and visual complexity |
| Abstract Collage | Colored paper, textured scraps | Non-representational, focus on shapes and color | Expressive, emotional art |
| Photomontage | Photographs, printed images | Realistic or surreal compositions | Experimental and conceptual projects |
| Eco Collage | Natural materials, recycled paper | Organic textures, earthy tones | Environmentally conscious art |
In Closing
Paper collage is a wonderfully versatile art form that invites endless creativity and personal expression. Whether you’re layering textures, experimenting with color, or telling a story through your work, the tools and techniques you choose play a vital role. Embrace the process, enjoy the tactile experience, and don’t be afraid to try new ideas. Your unique vision will shine through every cut and layer, making your collage truly one of a kind.
Useful Tips to Remember
1. Always keep a variety of paper types and weights on hand to add depth and texture to your collages.
2. Use acid-free adhesives like PVA glue to maintain the longevity and appearance of your artwork.
3. Set up a well-lit, organized workspace with all your tools within reach to stay focused and efficient.
4. Experiment with layering and mixed media to create more dynamic and engaging pieces.
5. Protect your finished collages with proper framing and avoid direct sunlight to preserve colors over time.
Key Takeaways
Choosing the right materials and mastering essential techniques are fundamental to successful paper collage art. Maintaining a clean, organized workspace and using quality adhesives and cutting tools ensure your work looks polished and professional. Balancing complexity with simplicity allows your artistic message to come through clearly, while thoughtful display and preservation methods keep your creations vibrant and intact for years to come.
Frequently Asked Questions (FAQ) 📖
Q: What materials do I need to get started with paper art collage?
A: To begin with paper collage, you’ll want a variety of papers such as colored sheets, magazines, newspapers, tissue paper, or textured scraps. You’ll also need glue—either a glue stick or liquid adhesive—scissors, and a sturdy base like cardstock or canvas to build your collage on.
Optional tools like tweezers for placing small pieces, craft knives for precise cuts, and a cutting mat can make your process smoother. The beauty is, you can start with simple materials found around the house, making it very accessible.
Q: How can I make my paper collage more visually interesting and dynamic?
A: Adding depth and variety is key. Try layering different textures and thicknesses of paper to create a tactile feel. Mixing colors with contrasting or complementary tones makes the artwork pop.
Also, incorporating shapes of varying sizes and experimenting with overlapping elements can lead to a more engaging composition. Don’t be afraid to play with negative space or add small details like hand-drawn lines or stamps to personalize your piece.
From my experience, stepping back often and viewing your work from different angles helps you spot areas that need balance or extra flair.
Q: Is paper collage suitable for beginners, and how do I improve my skills over time?
A: Absolutely! Paper collage is wonderfully beginner-friendly because it doesn’t require advanced drawing or painting skills—just your creativity and willingness to experiment.
Start with simple projects focusing on basic shapes and color combinations, and gradually challenge yourself with more complex designs and layering techniques.
Watching tutorials, joining local workshops, or even sharing your work in online communities can offer inspiration and helpful feedback. Personally, I found that regular practice and embracing mistakes as part of the process helped me grow both confidence and skill.