For most first paper craft projects, a basic hand-cut setup with suitable paper, a sharp blade, a cutting mat, and the right adhesive is enough. Choose a pre-cut kit when you want guided assembly, or consider a digital cutting machine only for frequent, repeatable, detail-heavy work.

The best materials depend on whether you are making a card, a 3D model, layered art, or a group activity. Paper weight, grain direction, and surface finish all affect cutting, folding, and how well the finished piece holds its shape.
A reliable workflow matters more than buying every possible craft supply. Read the template first, score folds before bending them, label parts, and dry-fit sections before using glue.
If you are comparing paper craft kits, cutting tools, adhesives, or machine-cutting supplies, focus on the kind of projects you realistically plan to make.
A simple, well-organized setup can prevent wasted materials and frustrating restarts.
At a Glance
- Start simple: a sharp blade, cutting mat, paper, scoring tool, and suitable adhesive can handle many first projects.
- Match supplies to the design: paper surface, weight, and fold direction affect flat cards and structured 3D models differently.
- Reduce mistakes: label pieces, score fold lines, and dry-fit each section before gluing.
| Workflow | Best For | Main Advantage | What to Consider |
|---|---|---|---|
| Hand-cut setup | Cards, simple models, occasional projects | Flexible and uses a small set of basic craft supplies | Detailed cutting requires patience, blade control, and a good cutting mat |
| Pre-cut craft kit | Beginners, gifts, guided projects | Convenient parts and clearer assembly structure | Check what paper, adhesive, and tools are included before buying |
| Digital cutting machine | Repeatable, detail-heavy, or multi-piece designs | Can reduce repetitive cutting work | Requires compatible materials and setup time; it is not always faster for a simple one-off project |
Start With the Right Project Plan
Plan the result before choosing supplies. A paper craft project becomes easier when the design, available time, and intended use are clear from the start. A folded greeting card needs different paper and assembly steps than a layered wall piece or a detailed display model.
Three Quick Decisions: Purpose, Difficulty, and Available Time
First, decide where the finished project will go. A card may need clean folds and a flat surface. A freestanding model needs paper that can hold its shape. Layered art needs pieces that align neatly without showing excess adhesive.
Next, look honestly at the template complexity. Small tabs, narrow curves, and many numbered parts require slower cutting and more careful sorting. Finally, consider your available time. A simple hand-cut project may be the practical choice when you only need one design, while repeated sets can make a kit or cutting-machine workflow more appealing.
Top Summary: The Simplest Setup for Most First Projects
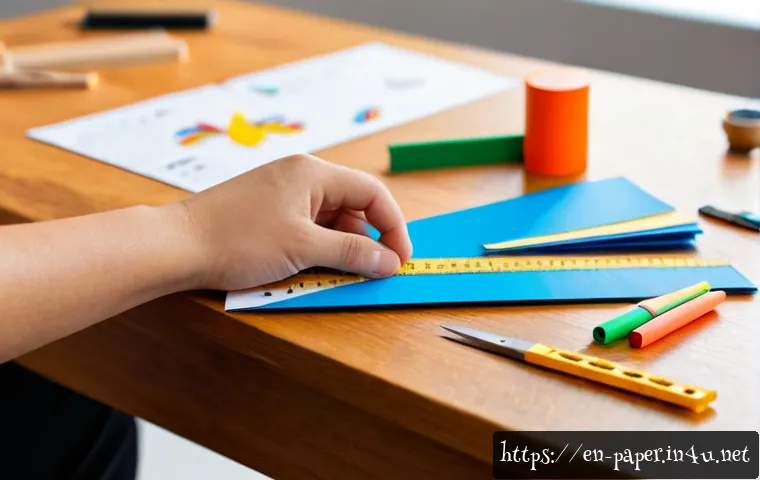
For a first project, use paper suited to the template, a sharp craft blade or scissors, a self-healing cutting mat, a scoring tool, a ruler, and an adhesive that works with the paper surface. This setup gives you control without adding unnecessary equipment.
A dull blade can pull at paper fibers instead of making a clean cut. A cutting mat supports steadier cuts and helps protect the work surface. For projects with fold lines, scoring before folding can produce more accurate creases and cleaner edges.
How to Read a Template Before Cutting Any Paper
Read the full template before cutting the first piece. Identify cut lines, fold lines, tabs, layers, and part labels. If the template uses numbers or letters, keep those identifiers visible until assembly is complete.
Check whether folds should go inward or outward, and note which sections will be hidden after assembly. Complex templates are easier to manage when you cut pieces in groups, label them, and place them in a simple sorting tray or envelope.
Choose Paper, Tools, and Adhesive by Project Type
The right material is the one that supports the structure and finish you need. Paper weight, grain direction, texture, and coating can all change how a project cuts, folds, and holds together.
Comparison Table: Hand-Cut Setup, Craft Kit, and Digital Cutting Machine
Use a hand-cut setup when you want flexibility and are making occasional projects. Choose a paper craft kit when clear guidance and prepared components matter more than customization. Consider a digital cutting machine when you expect to repeat detailed cuts, but remember that compatible materials and setup are part of the workflow.
When comparing craft supplies or cutting-machine materials, look beyond the tool itself. Check whether your chosen paper, blade type, mat, and template format work together.
Paper Weight, Texture, and Color Choices for Flat and 3D Designs
For flat cards and simple classroom crafts, choose paper that folds cleanly and suits the design. For 3D models, use paper that can maintain shape without becoming difficult to fold. Paper grain direction matters because paper generally folds more easily in one direction than the other.
Surface finish also matters. Smooth or coated paper may affect how adhesive grips, while textured paper can change the appearance of layered art. Before committing to a large project, test a small fold and a small glued area using the same materials.
Color selection is practical as well as decorative. High-contrast layers can make details easier to see, while similar shades may require more careful alignment during assembly.
When a Basic Tool Set Is Enough—and When an Upgrade Adds Value
A basic tool set is enough for many cards, simple templates, and occasional hobby projects. Upgrade only when a repeated problem appears: frequent detailed cutting, many identical pieces, or difficulty keeping layers consistent.
A digital cutting machine can be useful for repeated shapes and intricate layouts. However, it still requires setup and compatible supplies, so it may not be the best option for every quick project. If you are considering a kit or machine, review the included materials, replacement blade options, compatible paper guidance, and storage needs on the product page.
Follow a Clean Build Workflow
Work in stages rather than trying to assemble as you cut. A clean workflow makes it easier to catch an incorrect fold, missing piece, or alignment issue before adhesive makes the mistake permanent.
Print or Prepare the Template at the Correct Size
Prepare the template at its intended size before cutting. A change in size can affect tabs, layers, and fit between connected pieces. Keep the reference image or assembly guide nearby so you can compare each section as you work.
Cut, Score, Fold, and Sort Pieces in the Right Order
Cut outer edges carefully, especially around narrow details. Use a sharp blade with a self-healing mat for controlled cuts when the design is too detailed for scissors. Replace or sharpen blades as needed rather than forcing a dull edge through the paper.
Score fold lines before folding. Then make folds gradually, using a ruler or folding tool if helpful. Sort pieces by label, color, or assembly stage. This simple step is especially useful for layered paper art and multi-part models.
Dry-Fit Sections Before Applying Adhesive
Place pieces together without glue first. This is called a dry fit. It helps you confirm orientation, spacing, and tab placement before there is any risk of visible glue marks or misaligned layers.
For a model, dry-fit one small section at a time. For layered art, check the order of layers and make sure focal details remain visible. If a piece does not sit correctly, adjust the fold or trim only after checking the template again.

Assemble, Press, and Allow Time for the Project to Set
Use adhesive sparingly and apply it where the template requires support. Different adhesives behave differently depending on paper surface, drying time, and the required strength. Too much glue can leave marks, cause warping, or create a weak-looking edge.
Press joined areas gently and keep the project stable while the adhesive sets. Avoid moving a layered or 3D piece too soon. If you need to display the project later, consider where it will sit and whether its paper and adhesive are appropriate for those conditions.
Avoid the Most Common Paper Craft Mistakes
Most paper craft problems can be prevented before assembly. Clean cuts, controlled adhesive use, and careful checking are more valuable than rushing through a template.
Prevent Torn Edges and Inaccurate Cuts
Torn edges often happen when the blade is dull, the paper shifts, or the cut is rushed. Keep the paper supported on a cutting mat and make controlled passes rather than forcing the blade. For curves and small details, rotate the paper when possible instead of twisting your hand into an awkward position.
Reduce Glue Marks, Warping, and Weak Joins
Glue marks and warping are usually linked to excess moisture or an adhesive that does not suit the paper surface. Test adhesive on a scrap first, especially with coated, textured, or colored paper. Apply a small amount, spread it carefully, and avoid pressing so hard that it squeezes beyond the edge.
If a join needs strength, make sure the contact surfaces are aligned and held in place while setting. The best adhesive choice can vary with the template, paper coating, humidity, and display conditions.
Fix Alignment Issues Without Restarting the Whole Project
If layers do not line up, pause before attaching more pieces. Compare the section to the template, then check fold direction and part labels. A small adjustment at an early stage may correct the rest of the assembly.
For layered designs, build from a clear reference edge or central feature. For models, correct one connection at a time. Trying to force later pieces into place can make the misalignment more noticeable.
Adapt the Process for Cards, Models, Layered Art, and Group Crafts
Use the same basic workflow, but adjust the preparation for the project type. The more people or pieces involved, the more useful labeling and pre-sorting become.
Quick Projects for Beginners and Children With Supervision
Cards, flat decorations, and simple folded shapes are practical starting points. Choose templates with clear fold lines and fewer pieces. Adults should supervise any use of sharp blades or other cutting tools. Pre-cut shapes or a beginner-friendly craft kit can make group participation easier.
Detailed Display Models for Patient Hobbyists
Display models benefit from careful scoring, accurate cutting, and dry-fitting. Work in short stages and keep labels on every part until it is attached. Use paper that suits the model’s structure, and test the folding behavior before cutting all of the pieces.
Repeatable Preparation for Classrooms, Parties, or Workshops
For group crafts, prepare materials by station or project stage. Sort paper by color, place adhesive separately, and provide clear examples of the finished shape. If many participants need the same detailed cut pieces, a pre-cut kit or digital cutting workflow may reduce repetitive preparation, provided the materials and setup fit the project.
Selection Criteria and Comparison Summary
Choose hand tools if flexibility and low upfront cost matter most. Choose a craft kit if you want guided components and a more convenient starting point. Consider a digital cutting machine if you regularly make repeated, detail-heavy designs and are prepared for compatible materials and setup time.
Before buying, check the template type, the paper surface and structure you need, the condition or replacement options for blades, the adhesive’s suitability for your paper, and how you will store unfinished pieces. For kit contents, compatible materials, and product-specific details, review the official product page before making a decision.
Conclusion
A successful paper craft project starts with a realistic plan and a small set of suitable supplies. Choose paper for the way it needs to fold, cut, and hold shape, then use a sharp blade, careful scoring, and measured adhesive application.
Whether you work by hand, use a craft kit, or prepare files for a cutting machine, the same habits matter: read the template, organize the pieces, and dry-fit before gluing. Those steps help create cleaner work without making the process unnecessarily complicated.
Useful Things to Know
Paper grain direction can affect how smoothly a fold forms. Surface finish can affect adhesive performance. Dry-fitting is one of the easiest ways to catch a reversed or misplaced piece before assembly. Keeping small parts labeled can save significant time on complex templates.
Important Notes
The best paper, adhesive, kit, or cutting method depends on the template, paper coating, humidity, intended display conditions, and the scale of the project. Supply costs and machine options vary by retailer, location, material quality, and project needs. Check compatibility details before purchasing paper craft supplies or digital cutting-machine materials.
Frequently Asked Questions
Q1. What basic supplies do I need to start making paper craft projects?
A1. Start with suitable paper, a sharp cutting tool or scissors, a self-healing cutting mat for blade work, a scoring tool, a ruler, and adhesive appropriate for the paper surface. Add supplies only when your template requires them.
Q2. Is a pre-cut paper craft kit worth buying for a beginner?
A2. A pre-cut kit can be useful when you want guidance and convenience. Check whether it includes the paper pieces, instructions, adhesive, or required tools, since kit contents can vary.
Q3. Should I use a digital cutting machine or cut paper craft templates by hand?
A3. Hand cutting is often practical for simple or one-off projects. A digital cutting machine may be useful for frequent, repeatable, or detail-heavy cutting, but it requires compatible materials and setup time, so it is not automatically faster for every design.